The Anatomy of a Crash Repair: Understanding What Goes on Behind the Scenes
Accidents happen, and when they do, crash repair is essential to restore both the appearance and structural integrity of your vehicle. Many Australians may wonder about what actually goes on behind the scenes in a crash repair, from the initial assessment to the final detailing. In this article, we’ll explore the comprehensive steps involved, providing insight into what to expect and why each stage is crucial. For those looking for reliable and detailed crash repair services, this breakdown will shed light on the expertise involved in bringing a vehicle back to life.
1. Initial Assessment and Estimation
The first step in any crash repair process is a thorough initial assessment. When a damaged vehicle arrives at the repair shop, it undergoes a visual inspection by trained technicians. They examine the visible damage, noting anything that needs repair or replacement, from dented panels to cracked lights. This inspection is crucial for identifying the scope of damage quickly.
After this initial examination, the technician typically uses specialised diagnostic tools to check the vehicle’s structural alignment and detect any issues that may not be visible to the naked eye. These tools allow repair shops to produce a detailed and accurate estimate of the repair costs, itemising parts, labour, and any additional services required.
Transparency is key here. Reputable repair shops will walk you through the estimate, explaining the costs and discussing potential variables. This open communication ensures you understand what’s involved in the repair process and can make informed decisions.
2. Disassembly and Damage Analysis
Once the repair estimate is approved, the vehicle moves to the disassembly stage. Technicians carefully dismantle damaged parts to access underlying areas and uncover hidden damage. This step often reveals structural issues or parts that require repair or replacement that weren’t visible during the initial assessment.
For example, an exterior dent might seem minor, but upon removing the panel, technicians might find that internal supports are bent or compromised. Identifying these problems at this stage helps prevent issues further down the line and ensures that the vehicle is fully restored to safe driving conditions. Adjustments to the initial estimate might be necessary based on this deeper analysis, which repair shops will communicate with you to maintain clarity and trust.
3. Structural Repair and Realignment
Structural integrity is essential for vehicle safety. After identifying damage, the next step is to realign and repair the frame or body structure of the vehicle. Technicians use precision tools like computerized frame measuring systems to assess and correct the vehicle’s alignment. If the frame has shifted due to impact, these tools can measure and realign the frame to its original specifications.
The process involves using hydraulic machines to apply controlled force to the vehicle’s frame, ensuring it returns to factory standards. Structural repairs are not just about appearances; they’re essential to restore the vehicle’s performance and crashworthiness, which protects you and your passengers in future incidents. By the end of this stage, the vehicle’s frame and structure are secure, providing a strong foundation for subsequent repairs.
4. Repairing or Replacing Damaged Parts
With structural repairs completed, the focus shifts to individual components that need repair or replacement. The decision between repairing or replacing a part depends on factors like the severity of the damage, the availability of parts, and safety considerations.
Original Equipment Manufacturer (OEM) parts are typically preferred for replacements, as they are designed to fit the vehicle’s exact specifications and maintain its quality and performance. Some repair shops may offer aftermarket parts as an alternative, but it’s essential to weigh the pros and cons, as OEM parts generally offer a better fit and durability.
Whether it’s a damaged bumper, a broken headlight, or a dented fender, every part is meticulously inspected, repaired, or replaced, ensuring your vehicle looks and functions like new.
5. Reassembly and Paint Matching
After parts are repaired or replaced, the reassembly stage begins. Technicians carefully put the vehicle back together, ensuring each component aligns perfectly. Proper reassembly is crucial for both aesthetics and functionality, as a misaligned bumper or improperly installed headlight can affect the vehicle’s overall appearance and performance.
A key part of this stage is paint matching. Using advanced paint-matching technology, technicians match the new paint to your car’s original colour, ensuring a seamless, factory-quality finish. This process involves analyzing the existing paint colour, considering factors like age and wear, and mixing paint accordingly. This attention to detail helps avoid mismatched panels, maintaining the car’s visual integrity.
6. Quality Control and Final Inspection
Once the vehicle is reassembled, it undergoes a rigorous quality control process. Technicians check every detail, from the alignment of body panels to the operation of lights and windows. This final inspection ensures that each aspect of the repair meets safety and quality standards, so the vehicle performs well and looks as good as new.
During this stage, repair specialists test the functionality of the vehicle, including lights, sensors, and safety features, to ensure that everything is in working order. For drivers, knowing that the vehicle has passed quality control means peace of mind, as it confirms that repairs meet both safety and aesthetic standards.
7. Detailing and Finishing Touches
With the main repair work complete, the vehicle enters the final stage of detailing. This step includes cleaning the interior and exterior, polishing surfaces, and applying protective coatings if necessary. Detailing ensures that the car looks pristine and creates a “like-new” feel, enhancing the overall repair experience.
Detailing is more than just aesthetics. By cleaning all surfaces and addressing minor imperfections, technicians add value to the repair, showing the care and attention to detail that customers appreciate. The goal is to make the vehicle look as close to new as possible, leaving the driver confident and satisfied.
8. Customer Pickup and Aftercare Advice
When the repairs and detailing are finished, it’s time for the customer to pick up their vehicle. At reputable repair shops, technicians will walk the customer through the repairs, explaining what was done and providing any necessary documentation. This final handover is an opportunity for the customer to ask questions and for the repair shop to share tips on aftercare.
Customers may receive advice on protecting the vehicle’s finish, checking for any post-repair issues, and scheduling follow-up maintenance if needed. Many shops also offer warranties on their work, underscoring their commitment to quality and customer satisfaction. Knowing you have aftercare support provides peace of mind and ensures your repaired vehicle stays in top condition.
Conclusion: Why Choosing a Reputable Repairer Makes a Difference
Understanding the anatomy of a crash repair reveals the complexity and care involved in restoring a vehicle. From the initial estimate to the final detailing, each step requires skill, attention, and quality tools. Choosing a reputable repairer ensures that your vehicle is repaired to high standards, ensuring both safety and aesthetics.
For Australians looking for crash repair services, being informed about what happens behind the scenes can guide better choices and lead to a more satisfying experience. Remember, a quality repair isn’t just about fixing what’s broken—it’s about restoring the value, safety, and appeal of your vehicle. Whether you’ve been in a minor fender-bender or a more severe accident, knowing the repair process can make all the difference in getting back on the road with confidence.
Here are some relevant articles from Dynamic Paint N Panel that complement the discussion on crash repair processes:
- Common Types of Collision Damage and How They’re Repaired
- The Art Behind Paint Matching Technology in Crash Repair
- The Importance of Crash Repair in Ensuring Your Safety on the Road
- How to Avoid Scams in the Crash Repair Industry
How to Fix a Car Dent: A Comprehensive Guide for South Australians
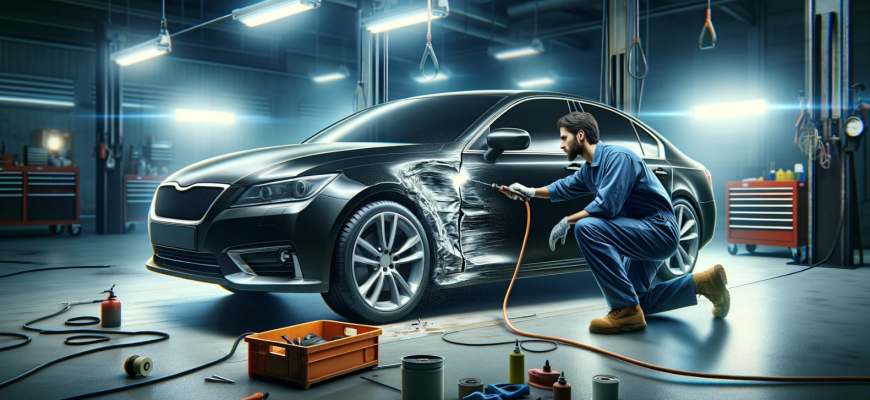
Car dents are more than just an eyesore; they can also decrease the value of your vehicle and, in some cases, affect its structural integrity. Whether it’s from a minor fender bender, hail damage, or a shopping cart mishap, understanding the process behind car dent repair is crucial for any car owner in Australia. This guide dives into the world of professional car dent repair, highlighting the expertise, tools, and considerations involved in making your vehicle look as good as new.
Understanding Car Dents
Car dents can vary significantly, from small dings to large indentations. The repair approach depends on several factors, including the dent’s size, location, and the vehicle’s body type. Understanding these differences is the first step in assessing repair options.
The Professional Dent Repair Process
Initial Assessment
A professional technician begins with a thorough assessment to understand the extent of the damage. This step is crucial as some dents may have underlying issues that aren’t immediately visible.
Repair Methodologies
Paintless Dent Removal (PDR): PDR is a popular repair method for small to medium-sized dents, where the paint surface is still intact. Technicians use special tools to gently massage the dent from behind the vehicle’s panel, restoring its original shape without needing to repaint the area.
Traditional Dent Repair: Larger dents or those where the paint has been compromised require a more invasive approach. This method involves sanding down the damaged area, applying a body filler, and repainting, which can be a time-consuming process.
Tools and Equipment
The tools for dent repair range from simple hand tools for PDR to sophisticated paint systems for matching the vehicle’s original color. 3D imaging technology is also becoming more prevalent for precise damage assessment.
The Expertise Behind Dent Repair
Dent repair is a skilled trade that requires significant training and experience. In Australia, technicians often undergo vocational training, such as a Certificate III in Automotive Body Repair Technology, complemented by years of on-the-job training. This expertise is crucial for effectively restoring a vehicle’s appearance and ensuring the repair lasts.
DIY vs. Professional Repair
While DIY kits are available, they often yield subpar results and can even worsen the damage. Professional repairs guarantee the use of the correct techniques and materials, ensuring a result that maintains your car’s value and appearance.
Choosing a Repair Service
When selecting a repair service, look for certified technicians with positive reviews and transparent warranty policies. Costs can vary based on the repair scope, but investing in quality repair is crucial for long-term satisfaction.
Maintenance Tips to Avoid Future Dents
Preventive measures can minimize the risk of dents. Parking away from other vehicles, using protective accessories like bumper guards, and maintaining a safe distance from potential hazards can help keep your car dent-free.
Car dent repair is a nuanced process that blends art and science. By understanding the types of dents, repair methodologies, and the importance of professional expertise, car owners can make informed decisions about their vehicle’s care. Always consult with a professional to assess and repair dents promptly, ensuring your car remains in pristine condition.
Remember, the appearance of your vehicle is not just about aesthetics; it’s also about maintaining its value and ensuring its longevity. Trusting professionals with the right training and tools for the job is the best way to achieve this.