How to Fix Mismatched Paint on Your Car
How to Fix Mismatched Paint on Your Car
Nothing detracts from the sleek look of a car quite like mismatched paint. Whether it’s due to the harsh Australian sun, an accident, or a previous repair job gone wrong, mismatched paint can be an eyesore and diminish the value of your vehicle. Fortunately, with the right tools and techniques, you can restore your car’s paint job to its former glory. This guide will walk you through the steps to fix mismatched paint on your car, ensuring your ride looks as good as new.
Understanding the Causes of Mismatched Paint
Mismatched paint can result from several factors, each affecting how you might approach the repair:
- Sun Exposure: Australia’s intense sunlight can fade car paint unevenly, particularly if your car is often parked outdoors. UV rays can degrade the paint over time, leading to noticeable differences in colour.
- Accidental Damage: Scratches, dents, and parts replacements can lead to sections of new or touched-up paint that doesn’t match the rest.
- Improper Repairs: Using different brands or batches of paint without proper colour matching can result in a noticeable lack of uniformity.
Recognising the root cause of the mismatch is your first step towards a successful repair.
Preparing to Fix Mismatched Paint
Before you start the repair, gathering the right materials and preparing the area is crucial. Here’s what you’ll need:
- Materials: Automotive primer, colour-matched automotive paint, clear coat, sandpaper (ranging from 400 to 2000 grit), masking tape, and a dust mask.
- Cleaning the Area: Wash the affected area thoroughly with soap and water to remove any dirt or grime. Follow up with a wax and grease remover to ensure that no contaminants interfere with your paint job.
- Safety First: Always work in a well-ventilated area and wear protective gear like gloves and a respirator mask to safeguard against fumes and dust.
Step-by-Step Guide to Fixing Mismatched Paint
Repairing mismatched paint involves several detailed steps. Here’s how to proceed:
Step 1: Cleaning and Sanding
Begin by sanding the mismatched area with 400-grit sandpaper to remove the glossy finish and create a surface that the new paint can adhere to. Be sure to feather the edges where the old and new paint will meet to help blend the colours seamlessly.
Step 2: Priming
Apply a thin coat of automotive primer to the sanded area. Allow it to dry according to the manufacturer’s instructions, then lightly sand with 600-grit sandpaper. This helps the new paint adhere better and contributes to a smoother appearance.
Step 3: Matching the Paint
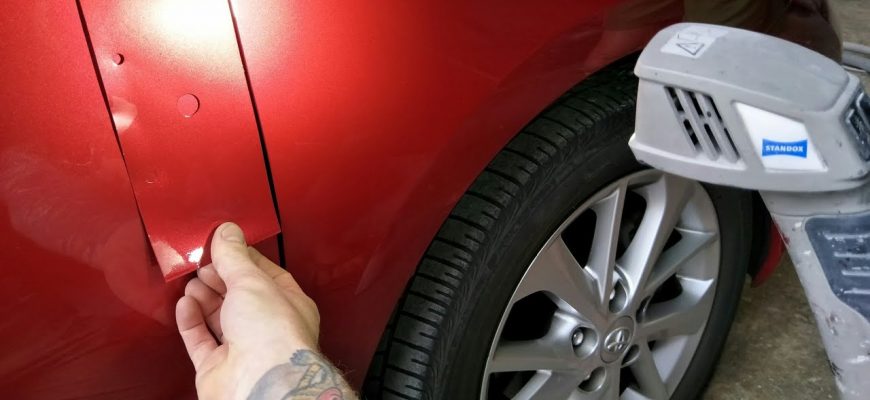
Achieving the perfect colour match is perhaps the most critical step. Utilize a reputable automotive paint supplier who can offer custom colour mixing services. Provide them with your car’s VIN to ensure the colour accuracy.
Step 4: Painting
After thoroughly mixing the paint, apply several thin coats, allowing each to dry as specified by the paint manufacturer. Use even strokes and maintain a consistent distance from the car to avoid drips and splotches.
Step 5: Applying Clear Coat
Once the paint is dry, apply a clear coat to protect the new paint and enhance the shine. Like with painting, apply the clear coat in thin, even layers.
Step 6: Polishing
After the clear coat has dried, use 2000-grit sandpaper to wet sand any bumps or imperfections. Finish by polishing the area with a buffing compound to achieve a smooth, glossy finish that matches the rest of your car.
Professional vs. DIY: What’s Best for Your Car?
While many car enthusiasts may opt for a DIY approach, consider the extent of the mismatch and your skill level. For extensive mismatches or high-end vehicles, consulting with a professional might be the best course. Professional painters have access to advanced tools and technologies, such as computerized colour-matching systems, that ensure a perfect match and high-quality finish.
Maintenance Tips to Avoid Future Paint Mismatch
Prevent future paint issues with regular maintenance:
- Regular Washing: Clean your car regularly to remove pollutants that may cause paint to fade.
- Waxing: Apply a quality wax every few months to protect the paint from UV rays and contaminants.
- Covered Parking: Whenever possible, park your car in shaded or covered areas to minimize exposure to sunlight.
Fixing mismatched paint on your car can be a satisfying project that restores its appearance and value. Whether you choose to tackle the job yourself or go professional, understanding the proper techniques and care involved will ensure your car looks its best. Remember, the key to a successful paint job lies in meticulous preparation and attention to detail. Happy painting!
This detailed guide provides general information to help you decide how best to fix mismatched paint on your car.
Other Great Information
- Overcoming the Challenges of Vintage Car Collision Repairs – This post might include insights on dealing with colour matching in older models where original paint might not be readily available.
- Navigating the World of Aftermarket Parts in Collision Repair – Discusses the use of aftermarket parts in repairs, which could affect paint matching and overall aesthetics.
- Enhancing Your Car’s Longevity with Quality Collision Repairs: A Guide for Australians – Provides comprehensive details on maintaining your car’s appearance through quality repairs, likely including painting tips.
- The Dos and Don’ts After a Collision: A Guide for Adelaide Drivers – Offers practical advice post-collision, which may include steps to ensure paint work is properly matched during repairs.