Car Wrapping: What It Is and Why Adelaide Drivers Love It

Categories: Tags:

Car Wrapping: What It Is and Why Adelaide Drivers Love It

Car wrapping has become a popular choice for vehicle owners in Adelaide looking to protect their cars and stand out on the road. Whether it’s for aesthetic appeal, branding, or practical benefits, car wrapping offers a flexible, cost-effective solution that is rapidly gaining traction. This guide explains what car wrapping is, its benefits, and why it has become a trend among Adelaide drivers.

What Is Car Wrapping?

Car wrapping is a process where a vinyl film is applied to the exterior of a vehicle, covering its original paintwork. This vinyl can be customized to display various colours, textures, patterns, or graphics, depending on the owner’s preference. Unlike a traditional paint job, car wrapping is not permanent and can be removed or replaced, making it a versatile option for both personal and commercial vehicles.

Types of Car Wraps

  1. Full Wraps: Covers the entire surface of the vehicle, offering a complete transformation.
  2. Partial Wraps: Focuses on specific areas, such as the roof, bonnet, or side panels.
  3. Printed Wraps: Includes custom designs or branding, often used for commercial purposes.

The Car Wrapping Process

Car wrapping involves multiple steps to ensure a smooth, long-lasting finish. Here’s a breakdown of what to expect:

1. Design Consultation

  • Discuss your vision with a professional car wrapping service.
  • Choose from a variety of colours, finishes (e.g., matte, gloss, satin), and custom graphics.
  • Consider practical factors like UV resistance and durability.

2. Surface Preparation

  • The vehicle is thoroughly cleaned to remove dirt, grease, and wax.
  • Any surface imperfections, such as scratches or dents, are addressed to ensure proper adhesion.

3. Vinyl Application

  • Highly skilled technicians apply the vinyl using heat guns and squeegees to achieve a seamless finish.
  • Edges and corners are carefully wrapped to prevent peeling.

4. Final Inspection

  • The wrap is inspected for bubbles, wrinkles, or misalignments.
  • A protective layer may be added to extend the wrap’s lifespan.

Why Do Adelaide Drivers Love Car Wrapping?

Adelaide’s car culture and the desire for personalization have made car wrapping a hit. Here’s why it resonates with drivers:

1. Aesthetic Appeal

  • Customization options are virtually limitless, allowing drivers to reflect their personality or brand.
  • Unique finishes like chrome, carbon fibre, or metallic wraps make vehicles stand out.

2. Paint Protection

  • Vinyl wraps protect the original paint from UV rays, minor abrasions, and environmental factors like bird droppings or tree sap.
  • This protection helps maintain the vehicle’s resale value.

3. Cost-Effective Alternative

  • Car wrapping is often more affordable than a high-quality paint job.
  • The non-permanent nature of wraps allows for updates without significant expense.

4. Durability and Longevity

  • Premium vinyl wraps can last 5-7 years with proper care.
  • Regular cleaning and avoiding abrasive materials ensure the wrap stays vibrant.

How to Choose a Car Wrapping Service in Adelaide

With numerous options available, selecting the right car wrapping service is crucial. Here are some tips:

1. Check Experience and Credentials

  • Look for certified installers with a portfolio of completed projects.
  • Experienced technicians ensure a high-quality finish.

2. Evaluate Material Quality

  • Opt for services that use reputable vinyl brands such as 3M or Avery Dennison.
  • High-quality materials resist fading, peeling, and cracking.

3. Read Customer Reviews

  • Online reviews and testimonials provide insights into a company’s reliability and customer satisfaction.
  • Ask for references if needed.

4. Consider Aftercare Services

  • Choose a provider that offers maintenance advice or additional protective coatings.
  • Inquire about warranties for peace of mind.

Car Wrapping vs. Paint Jobs: What’s the Difference?

While both options can enhance your vehicle’s appearance, car wrapping has distinct advantages over traditional painting:

Feature Car Wrapping Paint Job
Cost Generally more affordable Can be expensive
Customisation Highly customisable Limited by paint technology
Reversibility Easy to remove or replace Permanent
Time Quick application (1-3 days) Longer process (up to a week)
Durability 5-7 years with proper care 7-10 years before repainting

Maintaining a Vinyl Wrap: Tips for Longevity

To keep your wrap looking its best, follow these maintenance tips:

  • Regular Cleaning: Wash the vehicle weekly with a mild detergent and soft cloth.
  • Avoid Pressure Washers: High-pressure streams can damage the edges of the wrap.
  • Protect Against Harsh Elements: Park in shaded areas or use a car cover to minimise UV exposure.
  • Inspect for Damage: Address peeling or bubbling promptly to prevent further issues.

Suggested Reading

For more insights into vehicle customisation and care, check out these articles on Dynamic Paint N Panel:

Car wrapping is more than a trend—it’s a practical and creative way to enhance and protect your vehicle. Whether you’re a car enthusiast looking for a unique look or a business owner aiming to make a statement, car wrapping offers endless possibilities. Adelaide drivers are embracing this innovative solution for its flexibility, affordability, and undeniable style.


How Do You Cover Up Mismatched Paint?

Categories: Tags:

How Do You Cover Up Mismatched Paint?

Mismatched paint on a vehicle is a common issue, especially after a repair or touch-up job. It’s not only unsightly but can also impact your vehicle’s value if not addressed properly. In Australia, where UV exposure and environmental factors can wear down paint, mismatches are even more noticeable. So, how do you cover up mismatched paint and restore your car’s aesthetic? In this article, we’ll walk you through various strategies, from DIY solutions to professional fixes, ensuring you achieve a seamless and durable result.

Understanding Mismatched Paint: Causes and Concerns

Before diving into how to fix mismatched paint, it’s crucial to understand why it happens in the first place. A variety of factors contribute to this issue:

  • Age of the Original Paint: Over time, paint can fade due to UV exposure, especially in sunny climates like Australia. New paint, even if it’s the same colour, may not match the older, sun-faded paint on your vehicle.
  • Environmental Exposure: Constant exposure to the elements, such as pollution, dust, and even moisture, can affect your car’s paint over time. These external factors can make new paint look starkly different from the rest of the car.
  • Inconsistent Mixing or Application: Paint is made up of pigments, and even slight differences in mixing or application can result in mismatches. Some paint jobs may have been done improperly, using different brands or formulas, leading to noticeable differences.
  • Batch or Brand Variations: If you’re using paint from a different batch or brand than the original, the formulas might vary slightly, even if the colour code is identical. This small variation can be highly noticeable, especially in metallic or pearlescent finishes.

Understanding these causes will help you determine the best approach for fixing mismatched paint.

Step-by-Step Guide to Covering Up Mismatched Paint

1. Identify the Extent of the Mismatch

The first step in fixing mismatched paint is to assess the extent of the problem. Park your vehicle in a well-lit area, preferably outside in natural light, where paint variations will be most noticeable. Carefully inspect the repaired area from different angles to determine how the new paint compares to the original.

If the mismatch is subtle, you may be able to fix it with a DIY solution. For larger or more noticeable mismatches, you’ll likely need professional help.

2. Try Blending Techniques for Minor Mismatches

If the mismatch is small and located in a less visible area, you may be able to use blending techniques to smooth the transition between the old and new paint. Blending involves feathering the edges of the new paint into the existing paintwork.

  • Use a Professional Blending Agent: Blending agents are available in spray form and can help soften the edges between the mismatched areas. Apply the agent lightly, using multiple coats to gradually blend the two paint sections.
  • Match Paint Types: Ensure that the type of paint you’re using matches the original paint on your vehicle. Whether it’s lacquer, enamel, or urethane, consistency in the paint type will help the blending process.

Blending techniques can work well for minor discrepancies, but for larger issues, it’s often best to consult a professional.

3. Touch-Up Paint: When and How to Use It

For smaller scratches or chips that result in mismatched paint, touch-up paint may be a practical solution. Many manufacturers provide touch-up paint kits designed specifically for your car’s colour code.

  • Clean the Area Thoroughly: Before applying touch-up paint, make sure the area is clean. Use a solvent or isopropyl alcohol to remove dirt, grease, and wax.
  • Use a Fine Applicator: Touch-up paint often comes with an applicator, but for better precision, use a fine brush or even a toothpick for small chips. Apply thin layers, allowing each to dry fully before adding the next.
  • Layer the Paint: Matching the thickness of the surrounding paint is crucial for a seamless look. Apply multiple layers if necessary, ensuring that the final coat is smooth.
  • Finish with Clear Coat: After applying the touch-up paint, finish with a clear coat to protect the repair and blend it with the rest of the vehicle.

4. Professional Paint Matching: Why It’s the Best Option for Larger Jobs

For more significant mismatches, the best solution is to seek help from a professional auto body shop. Professional painters have access to sophisticated tools, such as:

  • Digital Paint-Matching Tools: These tools scan your vehicle’s existing paint and mix a formula that perfectly matches it. This is particularly important for complex paint jobs involving metallic or pearlescent finishes.
  • Paint Code Databases: Professional shops can access databases that contain precise paint codes for most vehicle makes and models. These codes ensure that the paint applied to your vehicle is as close as possible to the original factory paint.

Importance of Surface Preparation Before Repainting

Surface preparation is key to achieving a consistent and long-lasting paint job. Whether you’re attempting a DIY fix or having it done professionally, the surface must be properly prepared.

  • Sanding: Before applying new paint, lightly sand the area to ensure a smooth surface. This will help the new paint adhere better and prevent any texture inconsistencies.
  • Cleaning with Solvent: Use a solvent to remove dust, oils, or any other contaminants from the surface. This ensures that the paint bonds correctly and reduces the risk of future mismatches.
  • Priming: For larger areas, apply a primer before repainting. This creates an even surface and helps the new paint layer adhere properly.

The Role of Clear Coat in Achieving a Uniform Finish

A clear coat serves as a protective layer and plays a critical role in blending old and new paint. It gives your vehicle a uniform finish and adds UV protection, which is especially important in Australia’s sunny climate.

  • Multiple Light Layers: Apply the clear coat in thin, light layers rather than one thick coat. This will give you more control and help prevent drips or streaks.
  • UV Protection: A quality clear coat will help protect both the new and existing paint from UV damage, preventing fading and ensuring long-lasting results.

How to Avoid Mismatched Paint in the Future

Preventing mismatched paint in the future involves regular maintenance and choosing the right repair shop.

1. Regular Maintenance and Waxing

Waxing your vehicle regularly helps maintain the integrity of the paint. Wax acts as a protective barrier against environmental factors such as UV rays, pollution, and dirt.

2. Choosing the Right Repair Shop

When it comes to repairs, choosing a reputable body shop is critical. Look for shops that specialise in paint matching and use digital colour-matching tools. Ask about their paint processes and ensure they have experience with your car’s make and model.

Frequently Asked Questions About Mismatched Paint

  • How long will a paint repair last?
    A professionally matched and applied paint repair can last for many years, especially if maintained properly.
  • Can mismatched paint affect my car’s resale value?
    Yes, mismatched paint can significantly reduce your vehicle’s resale value. Buyers may perceive it as evidence of poor repairs or neglect.
  • What are the risks of trying to fix mismatched paint on my own?
    DIY paint jobs can lead to further mismatches if not done properly. It’s always best to consult a professional if you’re unsure.

Conclusion: Achieving a Seamless Finish

Covering up mismatched paint is not just about appearance; it’s also about maintaining your vehicle’s value and preventing further damage. Whether you try blending techniques or seek professional assistance, the key is careful preparation and execution. If you want a flawless finish that lasts, contact Dynamic Paint N Panel for expert advice and professional repair services.


How to Blend Mismatched Paint: A Comprehensive Guide for Australians

Categories: Tags:

How to Blend Mismatched Paint: A Comprehensive Guide for Australians

Blending mismatched paint can be a challenging task, whether it’s for automotive purposes or home repairs. This guide will provide detailed steps and tips to help Australians achieve a seamless finish.

Understanding the Importance of Blending Paint

Blending mismatched paint is crucial for maintaining the aesthetic appeal of your car or home. A poorly matched paint job can stand out and reduce the value of your property or vehicle. Properly blended paint ensures a uniform look, maintaining the overall integrity and appearance.

Preparing for the Task

Before you start blending mismatched paint, gather the necessary materials:

  • Automotive primer
  • Colour-matched paint
  • Clear coat
  • Sandpaper (various grits)
  • Masking tape
  • Protective gear (gloves, dust mask, respirator)

Step-by-Step Guide for Automotive Paint Blending

Cleaning and Sanding

  1. Clean the Area: Start by thoroughly washing the affected area with soap and water. Follow up with a wax and grease remover to eliminate any contaminants. This step is essential to ensure the new paint adheres properly​.
  2. Sand the Surface: Sand the mismatched area with 400-grit sandpaper to remove the glossy finish. Feather the edges to help blend the new paint with the old. This creates a surface that the new paint can adhere to more effectively​​.

Priming

  1. Apply Primer: Apply a thin coat of automotive primer to the sanded area. Let it dry according to the manufacturer’s instructions, then lightly sand with 600-grit sandpaper for a smooth base. Priming is crucial for ensuring the new paint sticks well and looks uniform.

Matching the Paint

  1. Achieve a Perfect Match: Use a reputable automotive paint supplier who can offer custom colour mixing services. Provide your car’s VIN to ensure the most accurate colour match. This step is critical for achieving a seamless blend between the old and new paint​.

Applying the Paint

  1. Apply Thin Coats: Mix the paint thoroughly and apply several thin coats, allowing each to dry as specified by the paint manufacturer. Use even strokes and maintain a consistent distance from the surface to avoid drips and splotches. Patience is key to achieving a smooth and professional-looking finish​.​.

Clear Coating

  1. Protect with Clear Coat: Once the paint is dry, apply a clear coat in thin, even layers to protect the new paint and enhance its shine. The clear coat adds durability and a glossy finish to the paint job​​.

Polishing

  1. Polish for Perfection: After the clear coat has dried, use 2000-grit sandpaper to wet sand any imperfections. Finish by polishing the area with a buffing compound to achieve a smooth, glossy finish that matches the rest of the car​.

Blending Paint for Home Repairs

Gathering Supplies

For home paint blending tasks, you’ll need high-quality brushes, fine-grit sandpaper, clean cloths, and painter’s tape. These tools will help you achieve a professional-looking result​​.

Preparation

  1. Clean the Damaged Area: Clean the area with a mild detergent and water. If the area is rough, use fine-grit sandpaper to smooth it before painting. This step ensures that the paint adheres properly and looks even​.

Applying Primer

  1. Prime the Surface: For extensive damage or faded paint, apply a thin layer of primer. Priming provides a solid base for the new paint and ensures a consistent finish​​.

Painting Technique

  1. Use Feathering Strokes: When applying the touch-up paint, use feathering strokes to blend the edges with the surrounding wall. This technique involves gradually reducing the pressure on your brush as you move away from the centre of the damaged area​​.
  2. Mimic Texture with Dry Brushing: For textured finishes, use a dry brushing technique to mimic the existing paint texture. Load your brush with a small amount of paint, then remove most of it by brushing it onto a clean cloth. Lightly brush the damaged area to create a subtle texture match​​.

Drying and Inspection

  1. Allow to Dry and Inspect: Allow the paint to dry completely, typically around 24 hours, before inspecting the area under different lighting conditions. Repeat the process if necessary to achieve a seamless blend​.

Tips and Tricks for Success

  • Test the Paint: Before applying the touch-up paint, test it on a discreet section to ensure a colour match. This step can save you from potential mismatches and additional work.
  • Inspect in Natural Lighting: Use natural lighting to inspect the blended area for the most accurate colour representation. Natural light can reveal differences in colour that artificial light might not show.
  • Apply Multiple Layers if Needed: If the touch-up paint is slightly off, apply multiple thin layers to achieve the perfect match. Patience and attention to detail are essential.
  • Practice on a Sample Board: If unsure, practice on a small sample board before attempting the actual repair. This allows you to refine your technique and gain confidence.

Professional vs. DIY

While DIY paint blending can be rewarding, it requires patience and precision. For extensive repairs or high-value vehicles, consulting a professional can ensure the highest quality results. Professionals have access to advanced tools and technologies that ensure a perfect match and a high-quality finish​​.

Suggested Reading

  1. The Top 10 Mistakes to Avoid After a Car Accident
  2. How to Maximise Your Car’s Resale Value After Collision Repairs
  3. Winter Driving Tips: How to Stay Safe on the Road During Winter
  4. The Importance of Wheel Alignment After a Collision Repair
  5. Preparing Your Teen for Safe Driving in Adelaide: Collision Avoidance Tips

By following these detailed steps and tips, you can successfully blend mismatched paint, whether it’s for your car or home, achieving a seamless and professional finish.


How to Spot Mismatched Paint

Categories: Tags:

How to Spot Mismatched Paint

Ensuring your vehicle’s paint matches perfectly after a repair is essential for maintaining its appearance and resale value. Mismatched paint can significantly diminish the overall look of your car and indicate poor repair quality. This comprehensive guide will help you understand how to spot mismatched paint, why it matters, and what steps to take if you notice discrepancies.

Why Paint Matching Matters

Aesthetics

A perfectly matched paint job ensures your car looks seamless and well-maintained. Any discrepancies can be easily noticeable, especially under direct sunlight or bright lighting, leading to a patchy and unprofessional appearance.

Resale Value

Consistent paintwork can enhance the resale value of your vehicle. Prospective buyers often look for signs of previous damage or repairs, and mismatched paint can be a red flag, potentially lowering the car’s market value.

Corrosion Protection

Proper paint application helps protect the underlying metal from corrosion. Mismatched paint might indicate improper preparation or application, leaving your car susceptible to rust and further damage.

Common Causes of Mismatched Paint

Inaccurate Color Mixing

One of the primary reasons for mismatched paint is inaccurate colour mixing. Paint shops need to follow precise formulas to match the original colour. Even slight variations can lead to noticeable differences.

Ageing and Weathering

The existing paint on your car might have faded over time due to sun exposure and weather conditions. This makes it challenging to match the new paint perfectly with the old.

Improper Application

Variations in application techniques, such as differences in spray pressure, distance, and angle, can lead to differences in appearance. Consistency in these factors is crucial for a seamless finish.

Signs of Mismatched Paint

Colour Variations

Look for differences in hue or shade between the repaired area and the original paint. Even slight discrepancies can be visible, especially in natural light.

Texture Differences

Mismatched paint might have a different texture or finish compared to the rest of the car. Run your hand over the painted surfaces to feel for any inconsistencies.

Inconsistent Gloss Levels

Check for differences in the level of gloss or shine. A mismatched paint job may appear duller or shinier than the rest of the vehicle.

Visible Edges

Noticeable lines or edges where the new paint meets the old can indicate a mismatch. These lines can often be seen around repaired areas if the blending process was not done correctly.

How to Inspect for Mismatched Paint

Good Lighting

Examine your car in natural daylight or under bright, even lighting conditions. This helps in identifying any colour discrepancies more effectively.

Different Angles

Look at the paintwork from various angles to spot any inconsistencies. Sometimes, mismatched paint can be more visible from certain viewpoints.

Touch Comparison

Run your hand over the painted surfaces to feel for differences in texture. A smooth, consistent texture indicates a well-done paint job.

Reflective Surfaces

Use reflective surfaces to highlight any variations in colour or gloss. Reflections can make it easier to spot differences that are not immediately apparent.

Tools and Techniques for Accurate Paint Matching

Spectrophotometers

Professional repair shops use spectrophotometers to measure the colour of the existing paint. These devices help mix a precise match by analysing the colour and producing an accurate formula.

Color Matching Systems

Advanced software systems can create an exact match based on the car’s original paint code. These systems consider various factors, including the car’s make, model, and year, to ensure an accurate match.

Blending Techniques

Skilled technicians use blending techniques to gradually merge new paint with the old, making transitions seamless. This involves feathering the new paint into the old and clear coating the entire area for uniformity.

What to Do If You Notice Mismatched Paint

Contact the Repair Shop

Reach out to the repair shop that performed the work and explain the issue. Reputable shops will stand by their work and offer to correct any discrepancies.

Request a Re-evaluation

Ask for a re-evaluation of the paintwork and discuss possible solutions. This may include repainting the affected area or adjusting the colour mix.

Seek a Second Opinion

If necessary, seek a second opinion from another reputable repair shop. They can provide an unbiased assessment and suggest the best course of action.

Choosing a Reputable Repair Shop

Certifications and Training

Ensure the shop has certified and trained technicians. Certifications from reputable organisations like I-CAR indicate a high standard of skill and knowledge.

Customer Reviews

Check online reviews and testimonials for feedback on their paint-matching quality. Positive reviews and high ratings are good indicators of reliable service.

Warranty Offered

A good repair shop will offer a warranty on their paintwork. This ensures that any issues, including mismatched paint, will be addressed without additional costs to you.

Conclusion

Spotting mismatched paint is essential for maintaining your car’s appearance and value. By understanding the common causes, knowing what to look for, and choosing a reputable repair shop, you can ensure your vehicle looks its best after any repair. For professional assistance and high-quality repairs, visit Dynamic Paint N Panel.

Suggested Reading

  1. The Impact of Road Conditions on Vehicle Wear and Collision Risk in Adelaide
  2. How to Deal with Insurance Claims After a Car Accident in Adelaide
  3. What to Do if You Hit a Roo: A Comprehensive Guide for South Australian Drivers
  4. How to Prepare Your Car for Repair: A Checklist for Adelaide Drivers


How to Keep Your Car’s Finish Looking New After a Repair

Categories: Tags:

How to Keep Your Car’s Finish Looking New After a Repair


After your car undergoes a repair, maintaining the finish is paramount to ensure it looks as good as new. Whether it’s a minor scratch repair or major panel work, the way you care for your car’s exterior can significantly affect its appearance and overall value. This guide will offer detailed insights into keeping your car’s finish pristine, protecting your investment and keeping your vehicle looking its best.

Understanding the Basics of Car Finishes

A car’s finish is more than just its paint. It includes several layers—primer, base paint, color, and a top clear coat—that together protect the metal underneath and ensure the car looks visually appealing. After repairs, these layers can be compromised, and without proper care, the finish may deteriorate prematurely. Common post-repair issues include color mismatches and uneven texture, which are often due to inferior paint quality or incorrect application techniques.

Preventive Measures Before the Repair

Choosing the right repair shop is crucial. Opt for a reputable service provider known for quality workmanship, like Dynamic Paint N Panel, to ensure that the materials used are of the highest standard and match the original finish of your car. Discuss the repair process in detail with your technician; understanding the materials and techniques used can help in maintaining the finish post-repair.

Post-Repair Care Techniques

The first few weeks after a repair are critical for the new paint. Avoid washing the car during this period as water and detergents can interfere with the curing process of the paint. Once the paint is set, incorporate regular maintenance into your routine. Wash the car every two weeks using a pH-neutral shampoo, and apply a quality car wax every six months to protect the paint and enhance its shine. For additional protection, consider a ceramic coating or paint protection film. These products form a barrier against contaminants and minor abrasions, extending the life of your finish.

Addressing Environmental Factors

Australia’s harsh climate can be tough on car finishes. UV radiation can fade paint over time, while salt from coastal areas can corrode it. To combat these elements, regularly wash your vehicle to remove contaminants like salt and bird droppings, which can cause damage if left unchecked. Using a car cover when parked outdoors can also protect your finish from the sun’s harmful rays and reduce the likelihood of environmental wear and tear.

Professional Maintenance and Periodic Evaluations

Even with diligent care at home, professional maintenance is advisable. Schedule annual inspections with a professional detailer to evaluate the integrity of your finish. These experts can perform services such as paint correction to remove imperfections and apply high-grade professional coatings that offer superior protection compared to over-the-counter products. Regular detailing not only keeps your car looking great but also identifies potential issues before they become serious problems.


Maintaining the finish of your car after a repair doesn’t just enhance its appearance—it preserves the vehicle’s market value and extends its lifespan. By understanding the basics of car finishes, taking preventative steps before and after repairs, and addressing the unique challenges posed by Australia’s environment, you can keep your car looking as good as new. Remember, the care you invest in today pays dividends in the future, ensuring that your car remains a source of pride and joy.

MORE FROM DPP

  1. The Importance of a Clean Car – This post explores why keeping your car clean is crucial not just for aesthetics but also for maintaining the paint and finish over time.
  2. How to Fix Mismatched Paint on Your Car – This article provides insights into addressing issues with paint mismatches after repairs, which is essential for maintaining a uniform appearance on your vehicle.
  3. How Do You Fix Factory Paint on a Car? An In-Depth Look at Paintless Dent Removal – The post details techniques like paintless dent removal which are important for fixing minor dents without compromising the factory paint.
  4. Overcoming the Challenges of Vintage Car Collision Repairs – This article discusses the unique challenges in maintaining and repairing the finishes of vintage cars following collisions.
  5. Navigating the World of Aftermarket Parts in Collision Repair – It covers how aftermarket parts can impact the overall finish of your car and what to consider for maintaining quality and appearance.


How to Fix Mismatched Paint on Your Car
Categories: Tags:

How to Fix Mismatched Paint on Your Car

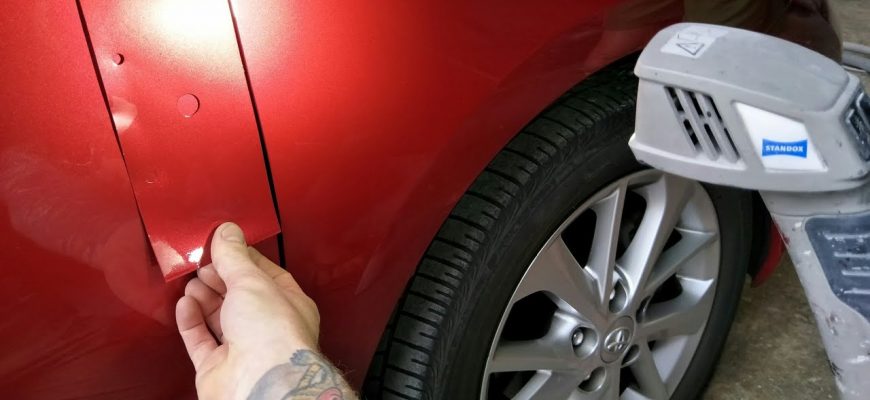
Nothing detracts from the sleek look of a car quite like mismatched paint. Whether it’s due to the harsh Australian sun, an accident, or a previous repair job gone wrong, mismatched paint can be an eyesore and diminish the value of your vehicle. Fortunately, with the right tools and techniques, you can restore your car’s paint job to its former glory. This guide will walk you through the steps to fix mismatched paint on your car, ensuring your ride looks as good as new.

Understanding the Causes of Mismatched Paint

Mismatched paint can result from several factors, each affecting how you might approach the repair:

  • Sun Exposure: Australia’s intense sunlight can fade car paint unevenly, particularly if your car is often parked outdoors. UV rays can degrade the paint over time, leading to noticeable differences in colour.
  • Accidental Damage: Scratches, dents, and parts replacements can lead to sections of new or touched-up paint that doesn’t match the rest.
  • Improper Repairs: Using different brands or batches of paint without proper colour matching can result in a noticeable lack of uniformity.

Recognising the root cause of the mismatch is your first step towards a successful repair.

Preparing to Fix Mismatched Paint

Before you start the repair, gathering the right materials and preparing the area is crucial. Here’s what you’ll need:

  • Materials: Automotive primer, colour-matched automotive paint, clear coat, sandpaper (ranging from 400 to 2000 grit), masking tape, and a dust mask.
  • Cleaning the Area: Wash the affected area thoroughly with soap and water to remove any dirt or grime. Follow up with a wax and grease remover to ensure that no contaminants interfere with your paint job.
  • Safety First: Always work in a well-ventilated area and wear protective gear like gloves and a respirator mask to safeguard against fumes and dust.

Step-by-Step Guide to Fixing Mismatched Paint

Repairing mismatched paint involves several detailed steps. Here’s how to proceed:

Step 1: Cleaning and Sanding

Begin by sanding the mismatched area with 400-grit sandpaper to remove the glossy finish and create a surface that the new paint can adhere to. Be sure to feather the edges where the old and new paint will meet to help blend the colours seamlessly.

Step 2: Priming

Apply a thin coat of automotive primer to the sanded area. Allow it to dry according to the manufacturer’s instructions, then lightly sand with 600-grit sandpaper. This helps the new paint adhere better and contributes to a smoother appearance.

Step 3: Matching the Paint

Achieving the perfect colour match is perhaps the most critical step. Utilize a reputable automotive paint supplier who can offer custom colour mixing services. Provide them with your car’s VIN to ensure the colour accuracy.

Step 4: Painting

After thoroughly mixing the paint, apply several thin coats, allowing each to dry as specified by the paint manufacturer. Use even strokes and maintain a consistent distance from the car to avoid drips and splotches.

Step 5: Applying Clear Coat

Once the paint is dry, apply a clear coat to protect the new paint and enhance the shine. Like with painting, apply the clear coat in thin, even layers.

Step 6: Polishing

After the clear coat has dried, use 2000-grit sandpaper to wet sand any bumps or imperfections. Finish by polishing the area with a buffing compound to achieve a smooth, glossy finish that matches the rest of your car.

Professional vs. DIY: What’s Best for Your Car?

While many car enthusiasts may opt for a DIY approach, consider the extent of the mismatch and your skill level. For extensive mismatches or high-end vehicles, consulting with a professional might be the best course. Professional painters have access to advanced tools and technologies, such as computerized colour-matching systems, that ensure a perfect match and high-quality finish.

Maintenance Tips to Avoid Future Paint Mismatch

Prevent future paint issues with regular maintenance:

  • Regular Washing: Clean your car regularly to remove pollutants that may cause paint to fade.
  • Waxing: Apply a quality wax every few months to protect the paint from UV rays and contaminants.
  • Covered Parking: Whenever possible, park your car in shaded or covered areas to minimize exposure to sunlight.

Fixing mismatched paint on your car can be a satisfying project that restores its appearance and value. Whether you choose to tackle the job yourself or go professional, understanding the proper techniques and care involved will ensure your car looks its best. Remember, the key to a successful paint job lies in meticulous preparation and attention to detail. Happy painting!

This detailed guide provides general information to help you decide how best to fix mismatched paint on your car.


Other Great Information

  1. Overcoming the Challenges of Vintage Car Collision Repairs – This post might include insights on dealing with colour matching in older models where original paint might not be readily available.
  2. Navigating the World of Aftermarket Parts in Collision Repair – Discusses the use of aftermarket parts in repairs, which could affect paint matching and overall aesthetics.
  3. Enhancing Your Car’s Longevity with Quality Collision Repairs: A Guide for Australians – Provides comprehensive details on maintaining your car’s appearance through quality repairs, likely including painting tips.
  4. The Dos and Don’ts After a Collision: A Guide for Adelaide Drivers – Offers practical advice post-collision, which may include steps to ensure paint work is properly matched during repairs.